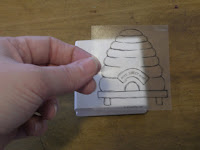
As I mentioned in my photo of the day blog our wonderful UPS delivery man came today, bearing a box full of new product from the soon-to-be-released Spring/Summer Idea Book and Catalogue. While putting together my new stamp sets, I thought now would be a perfect time to remind everyone how to assemble them, as Stampin' Up ships all their stamps unassembled to save production costs (savings that get passed on to you when you purchase them!)
 Step 1: Unpack the clear box the stamp elements come in - you'll find several wooden blocks, a sheet of rubber with your selected stamped images, and a sheet of clear adhesive labels.
  Step 2: The stamped images on the rubber sheet are all dye-cut, which means popping them out of the sheet is simple and easy. Once you've removed the image you want to use, peel it's adhesive backing off and adhere it to the appropriately sized wooden block.
 Step 3: Peel the corresponding adhesive label from the sheet and adhere it to the other side of the wooden block. Take care to ensure you're placing the label correctly, facing the same direction as the rubber image.
 Step 4: Once all your stamps are assembled, adhere the label with the name of your stamp set to the outside of the clear box. This helps you easily identify what set is in the box without taking it out, shows you how many stamps are included in the set, and also indicates any additional features of the set (ex. 2-step stamping sets are all marked as such).
 Step 5: Repack the assembled stamps in the clear box. On second thought... get them back out again and start playing! It's far too tempting to start using your new stamps immediately - they can be stored later.
 Bonus tip: Once your stamp set has been assembled, you will be left with a sheet of punched-out rubber. Don't think of this as garbage - it's actually a great money saving thing to have around (yes, something else I don't throw away). Using a pair of sharp scissors, you can cut pieces of this rubber to add dimension to your cards and scrapbook projects... simple use the sticky rubber and foam between layers of paper to create a great raised look!
No comments:
Post a Comment